Struggling with muddy green tones in your images? Read this!
Have you ever had a session with oddly green or muddy color casting on your client’s face? Spending hours to correct it in post, only to be met with lackluster final images? If this sounds like you, listen up because I’m about to fix this problem once and for all!
Here’s the problem I’m talking about…
( Images of what not to do courtesy of Darci Kline in the Collective Location take over teaching)
If you’ve been a Collective member for a while you know my focus in SO many of my teachings is LIGHTIN. How to see it and how to manipulate it. Whether you’re in a studio, outside, using LED lights, or natural light, my methods all have a common core formula across the board.
With studio lighting, there is a lot of control over the environment we are working in. Unless you’ve got Paul Bunyan on speed dial to chop trees down, outdoor sessions require some skills in knowing how to manipulate the light and location you’ve been dealt.
So…..Why the Green Cast?
The Season: Spring is here, and with it comes the challenge of dealing with the overly bright green foliage ( especially in the midwest. (shout to my fellow Indiana photogs fighting the walls of neon green trees right now lol). It’s obvious that while one spot works well in the late deadfall you might, see it fail you in the blooming season. Before you throw in the towel and never book in the spring or summer again- there are ways to work around it, stick with me here.
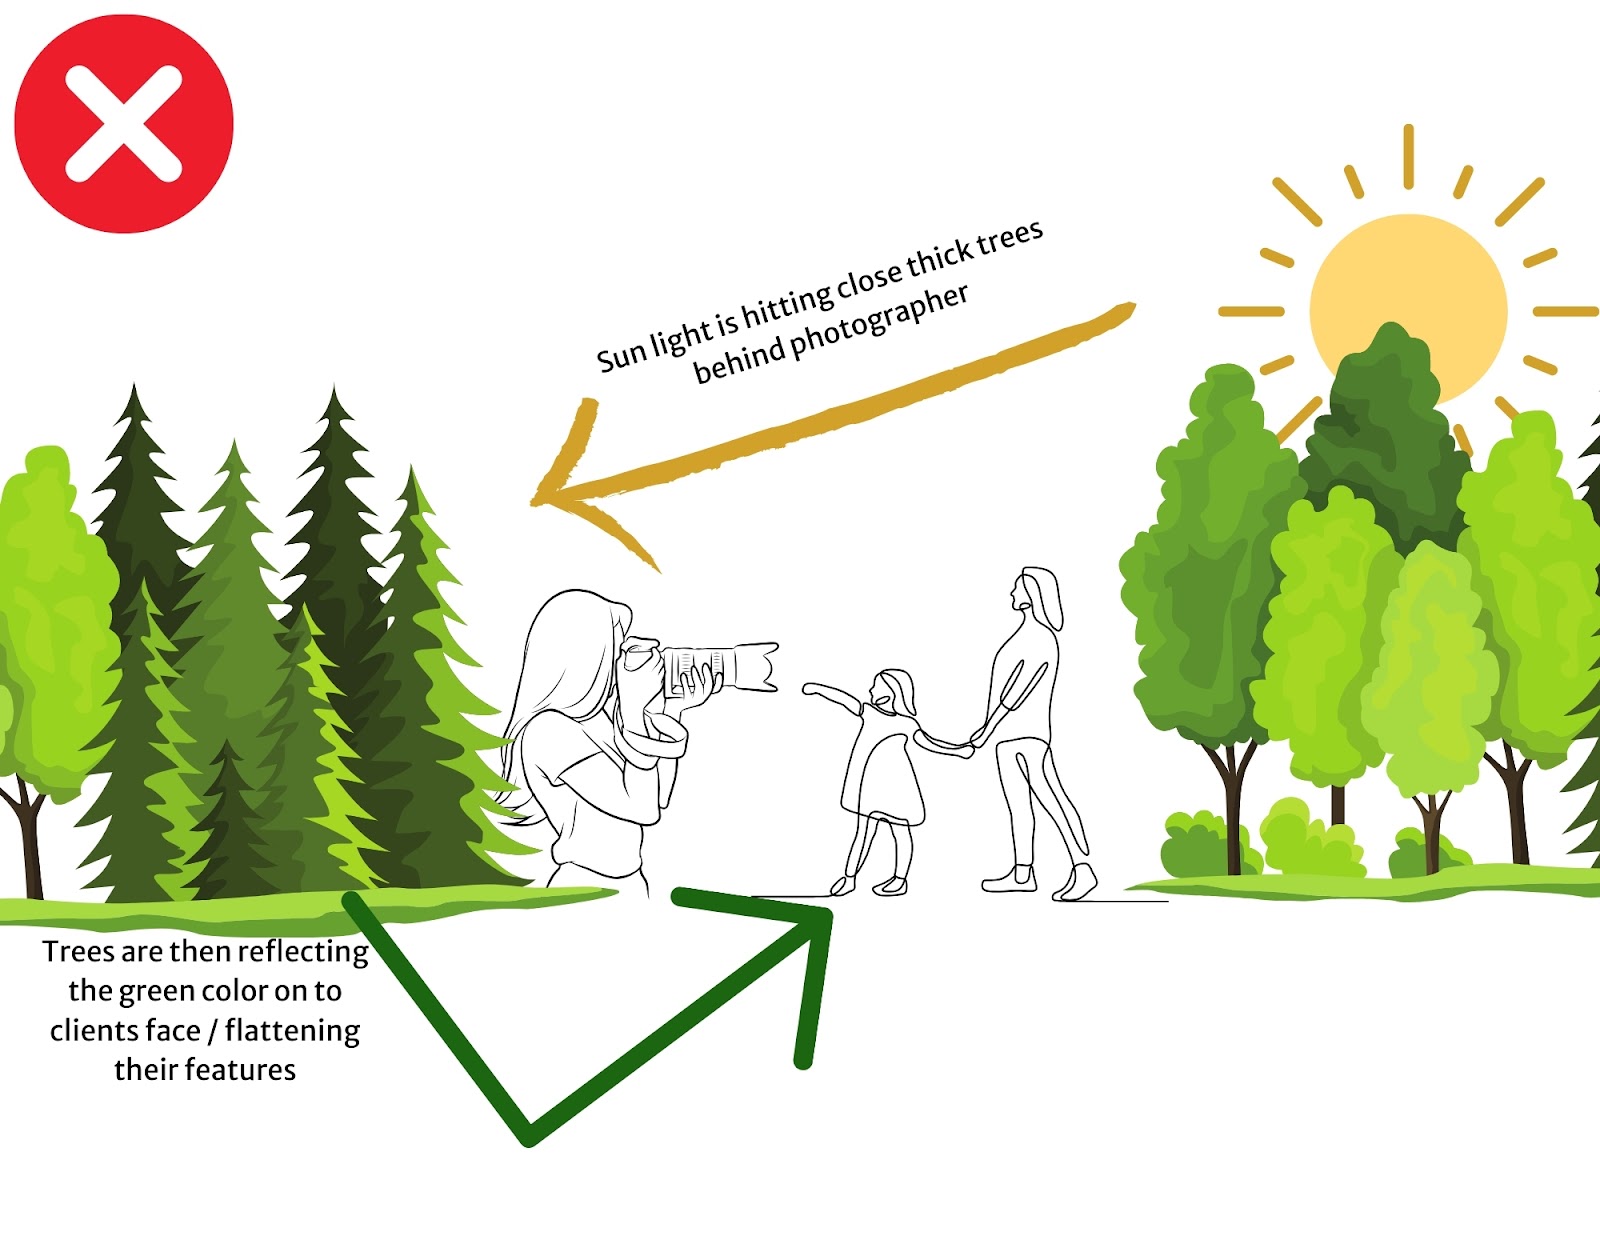
Reflection/absorption: (prepare to have your mind blown) This is where the real problem is. So often photographers put their subjects with the sun somewhere behind them, which means the sun is hitting whatever is behind the photographer. If you’re seeing green casting that means you’ve got too many trees or green foliage behind you (the photographer).
The sun is shining on that tree line behind you, which in turn is reflecting that green coloring from the trees back to your client’s face. Remember light is always bouncing off of surfaces. So, if there is a big red barn and your clients are facing it, they are gonna look red-casted and dulled out. The closer the trees are to you the photographer the more green you’re going to see. The light is about to bounce back to a much harsher example.
How to fix it….
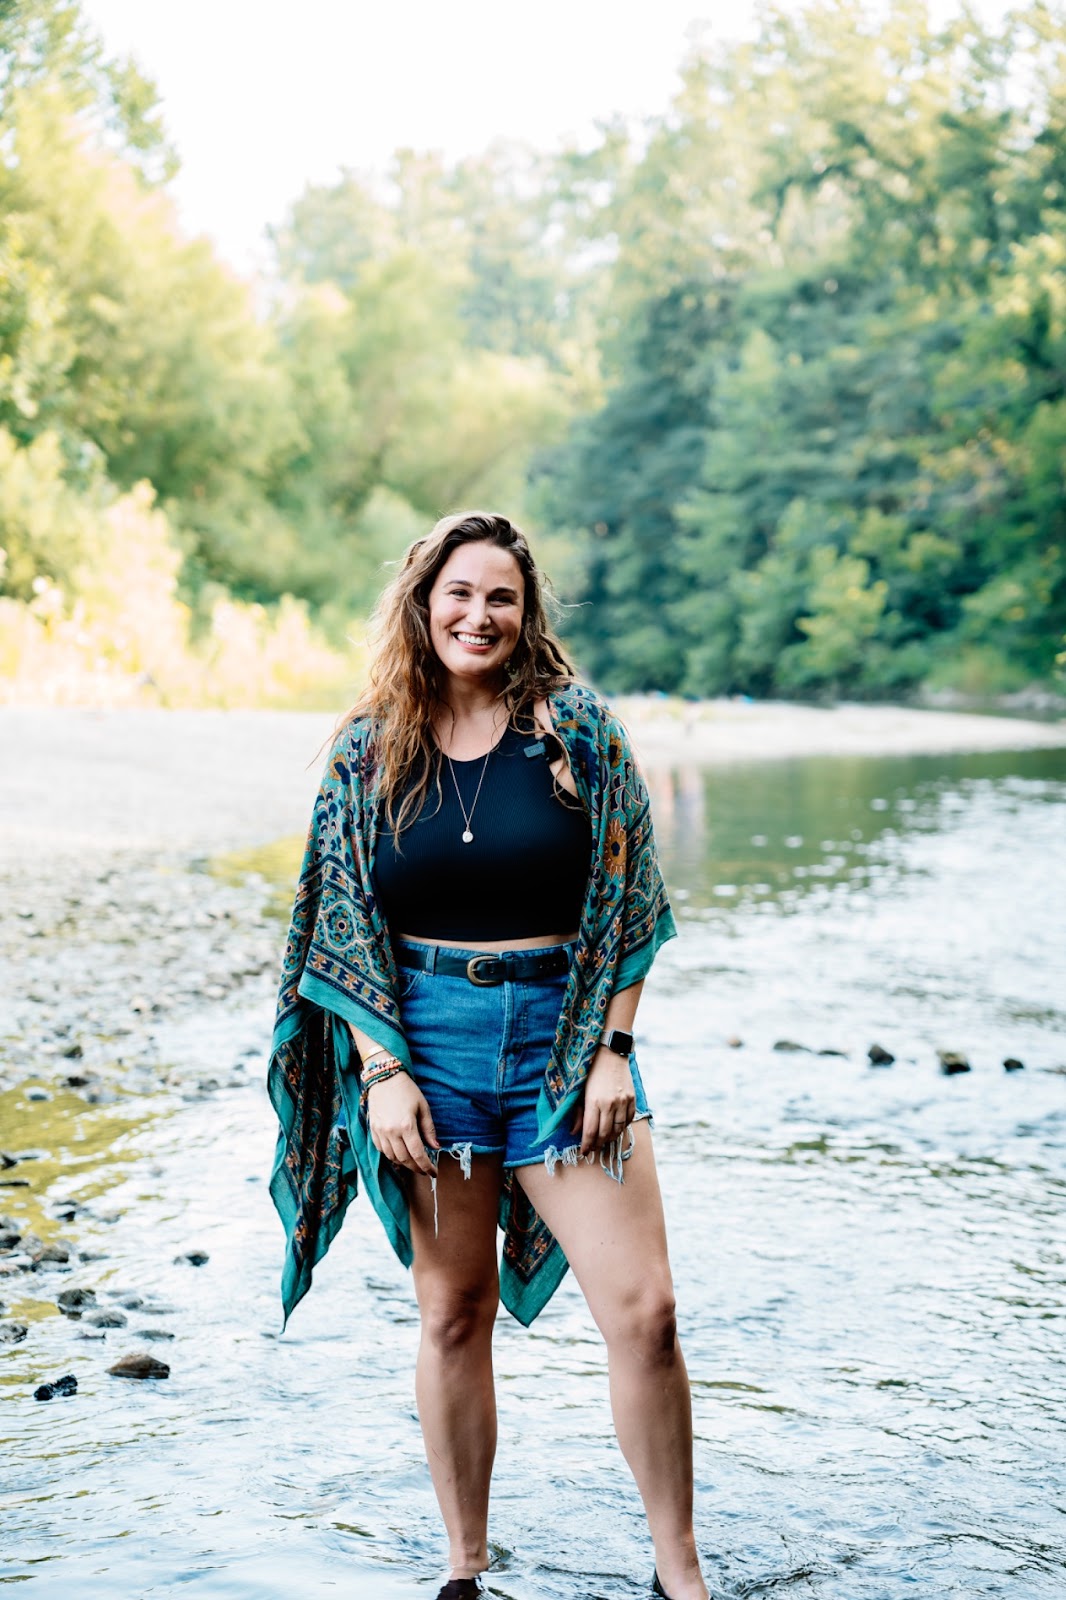
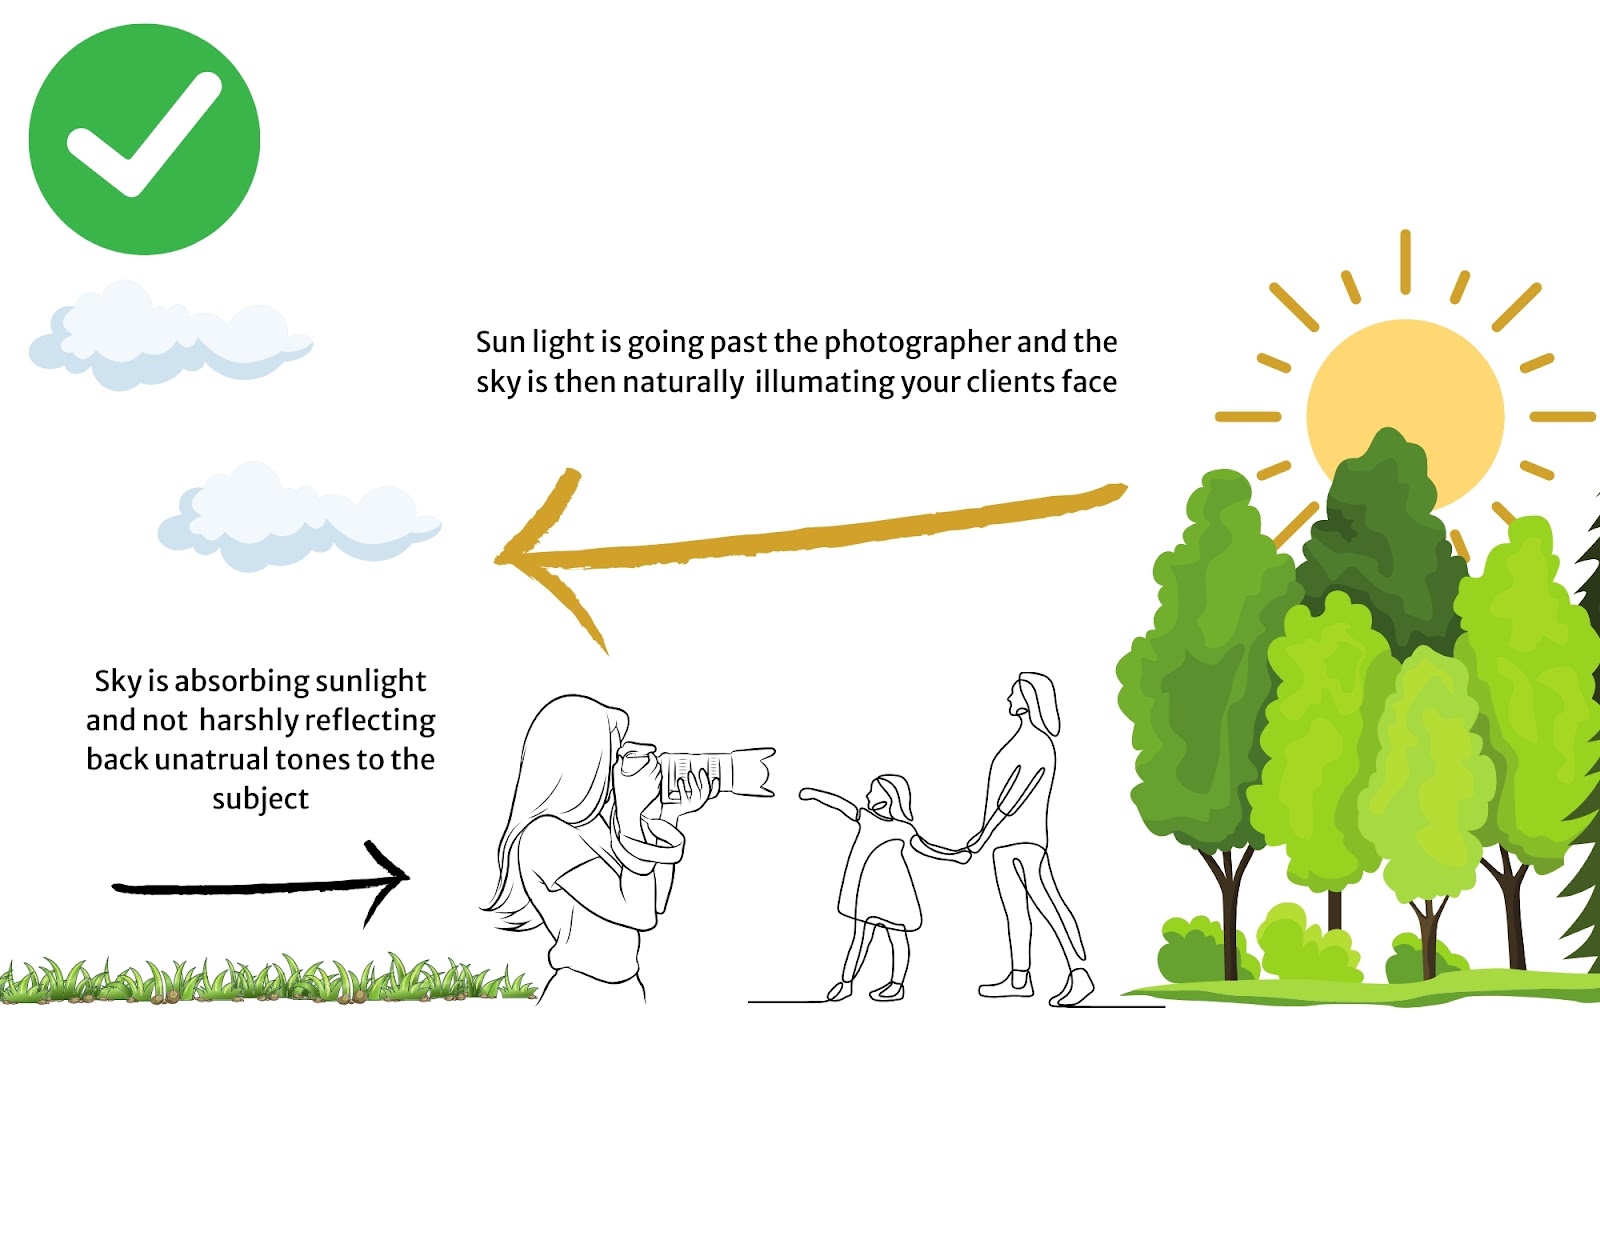
To stop this green casting and give your clients well-lit and true hues the name of the game is to always have open fields/ environment behind you (the photographer). You want to make sure your clients are always facing open fields. This allows the sun’s light to keep traveling on through the sky, not bounce back to your subject’s face. This is how you get a nice illuminated natural skin tone true to your client.
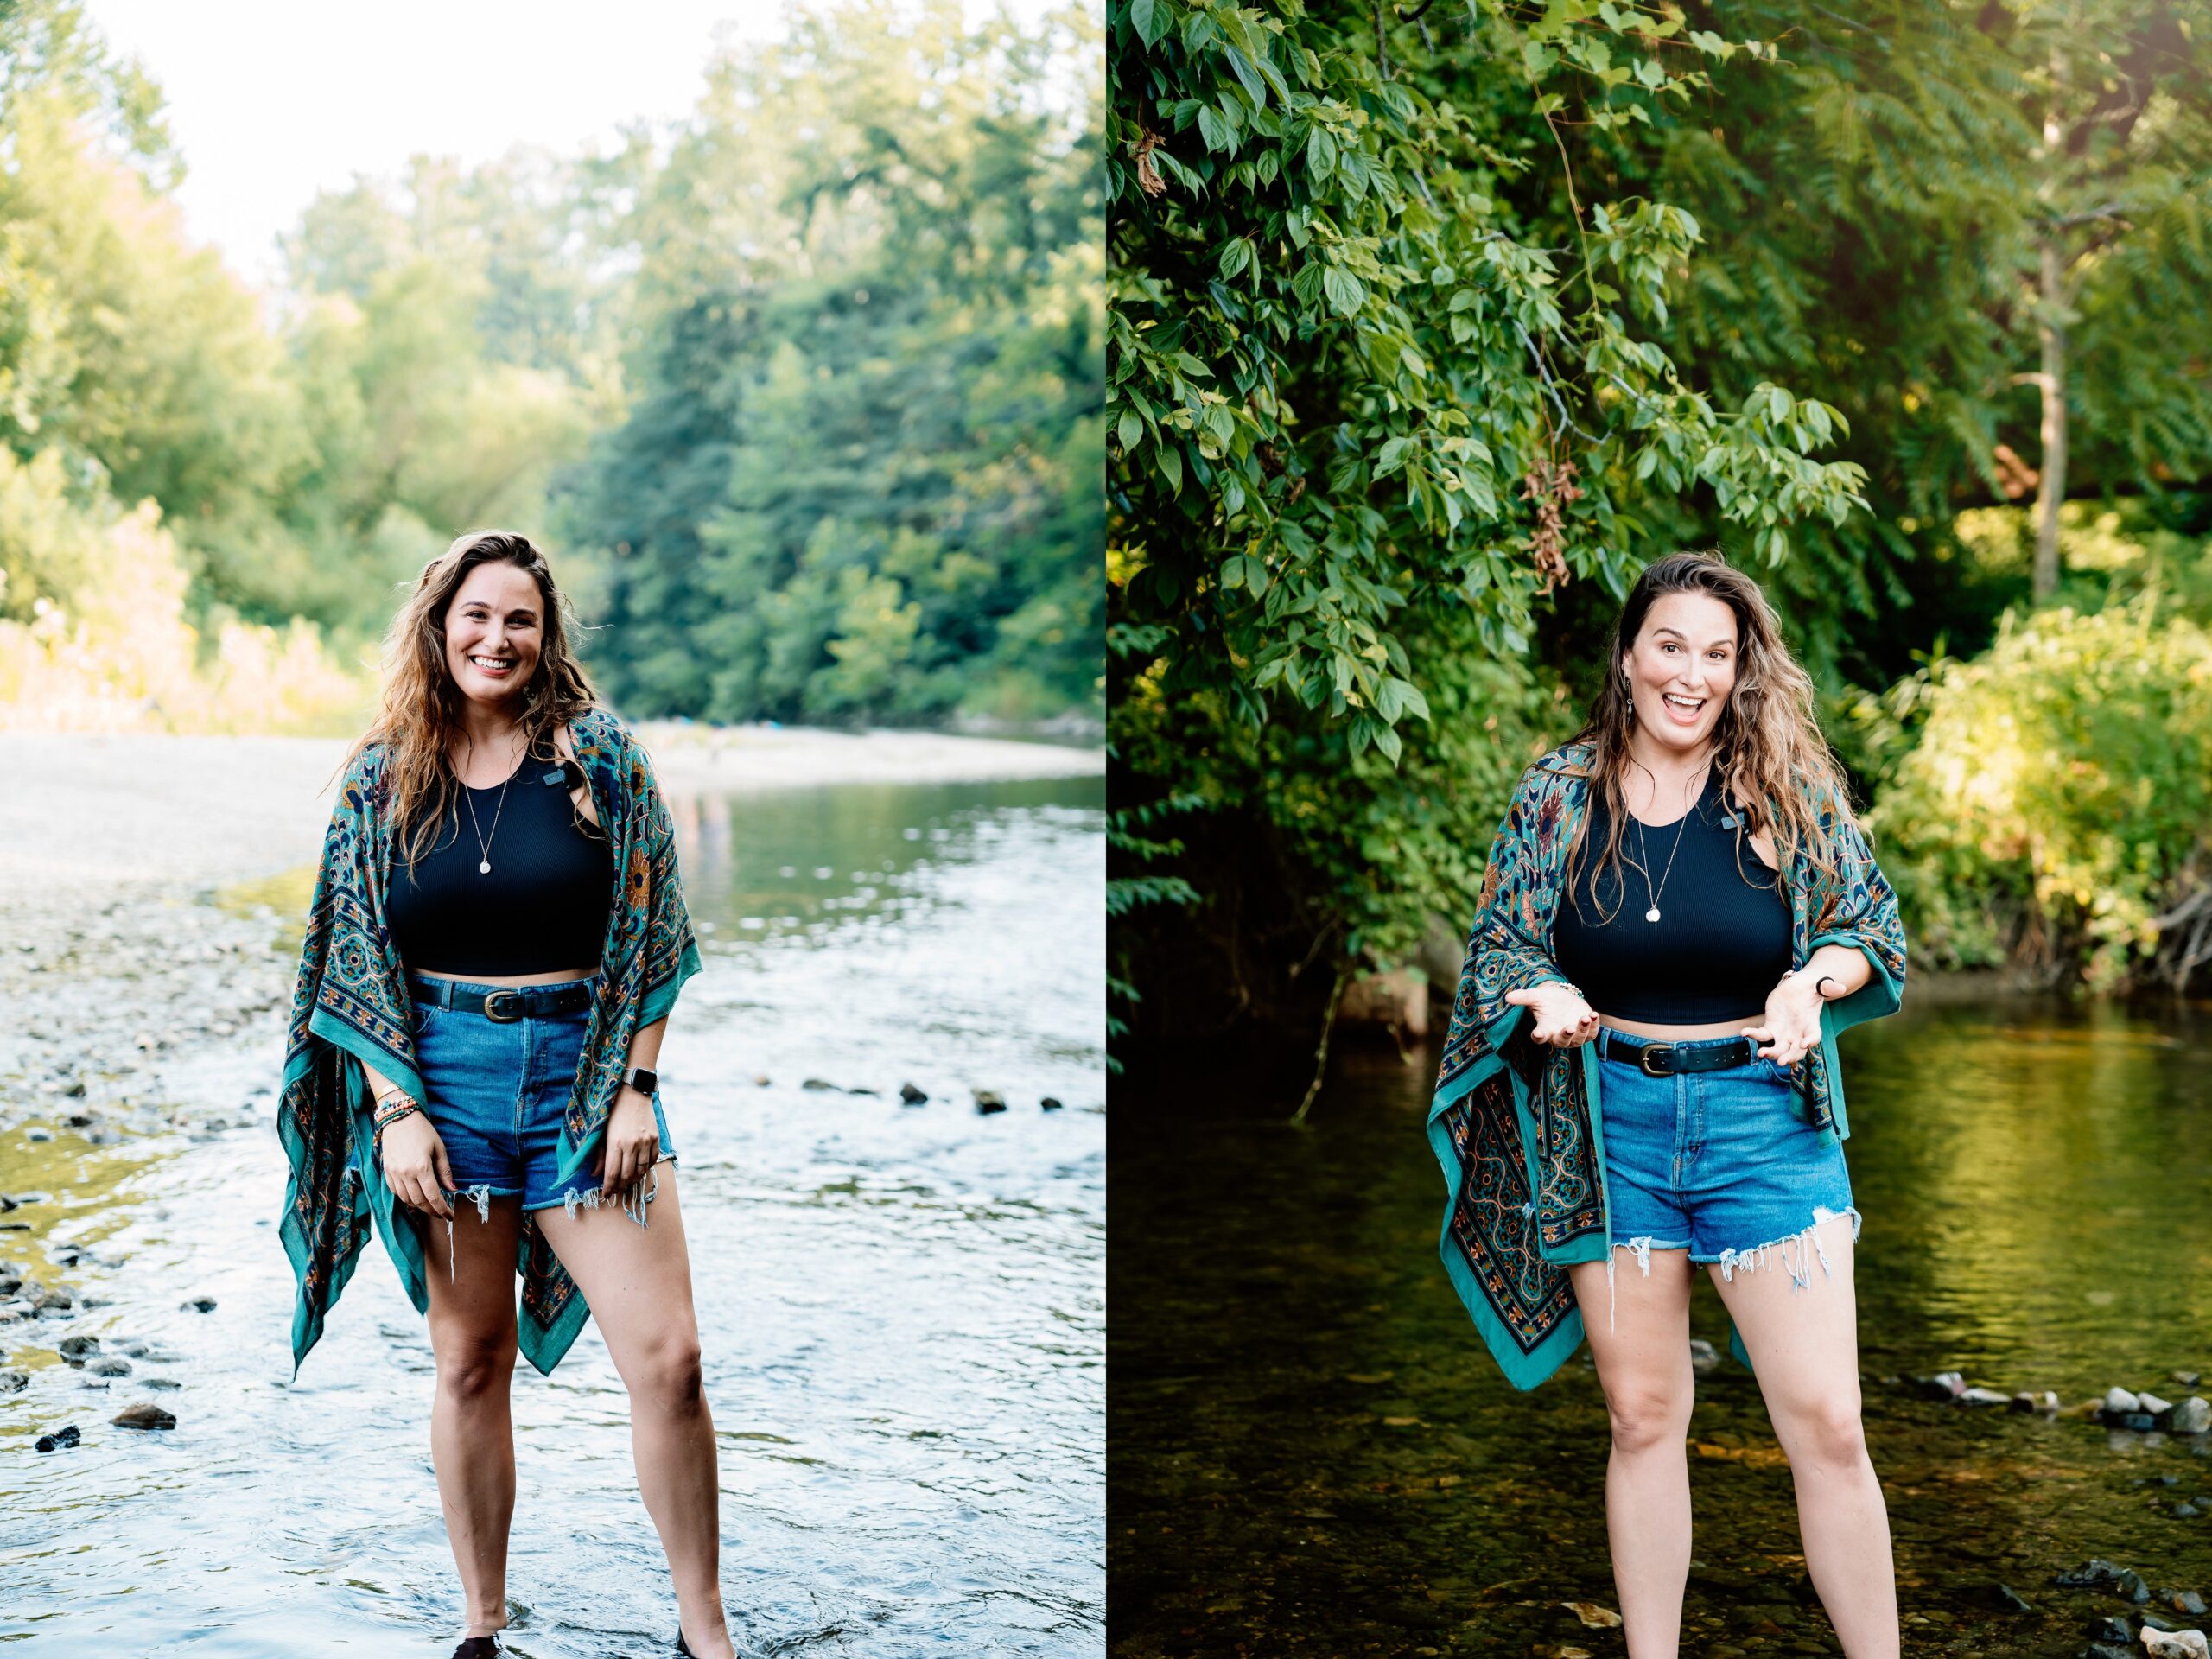
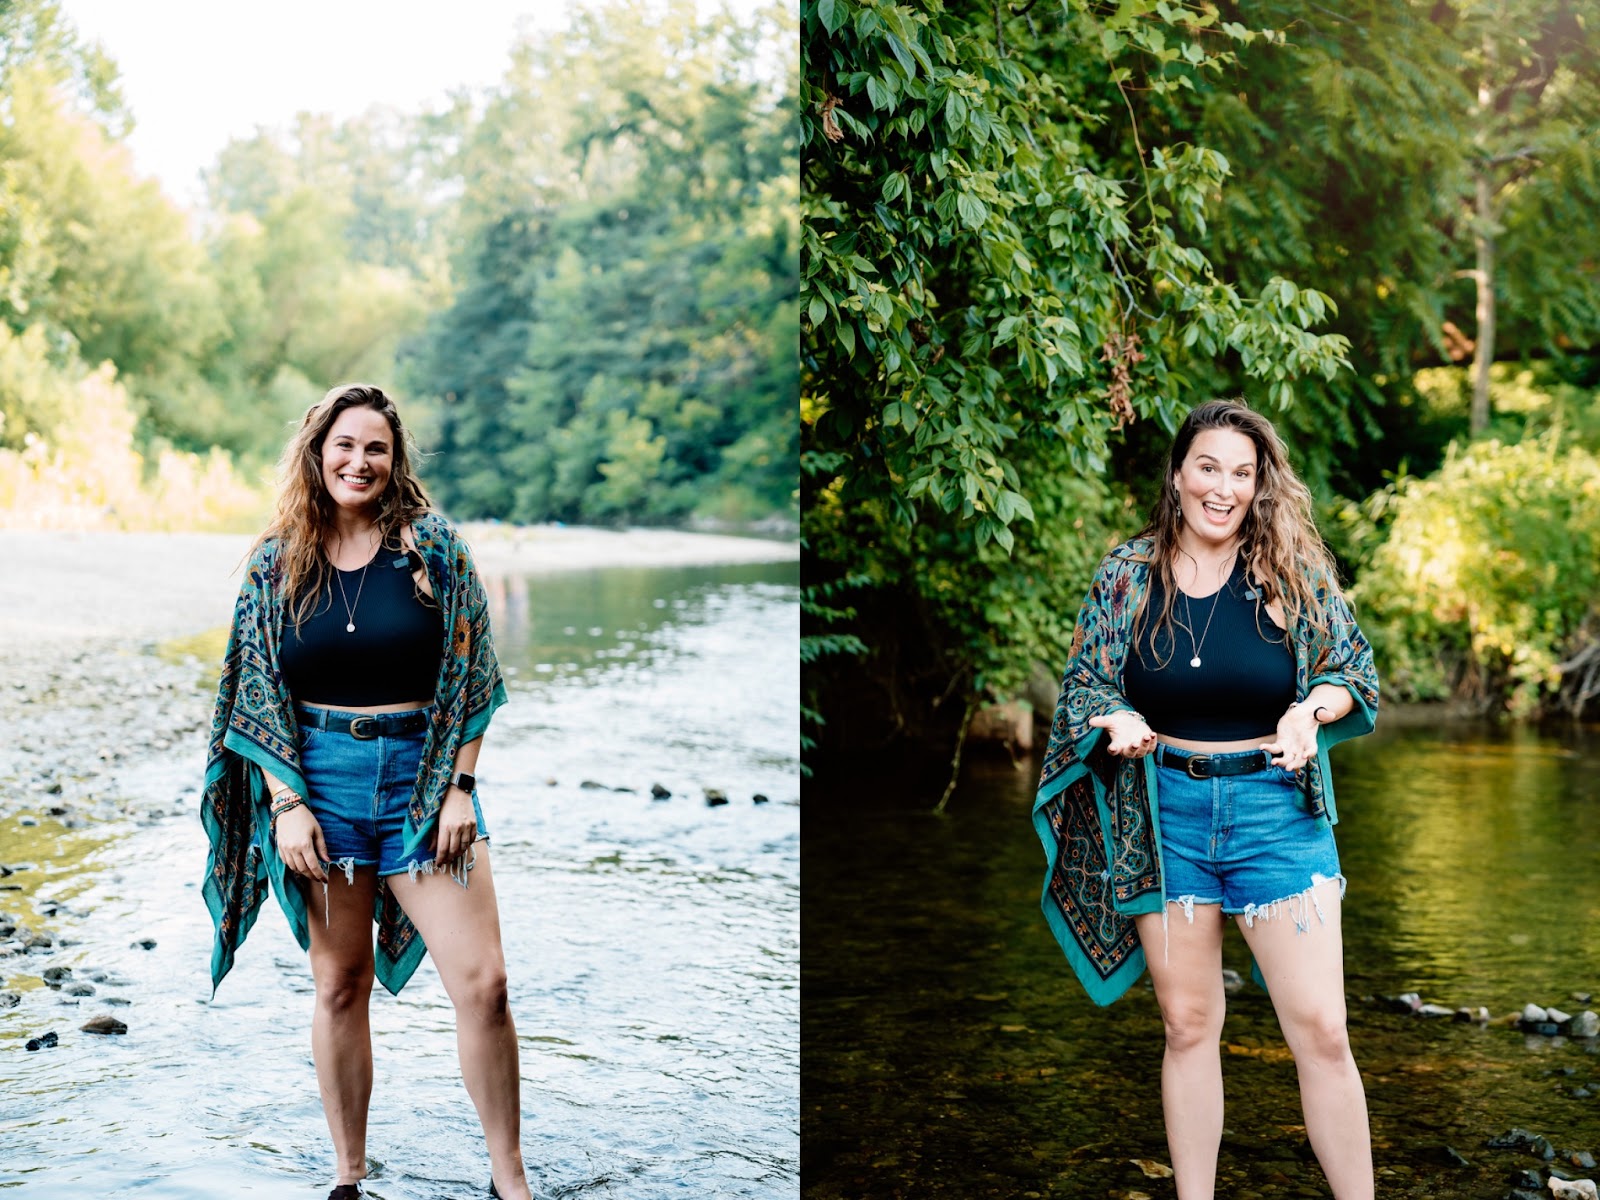
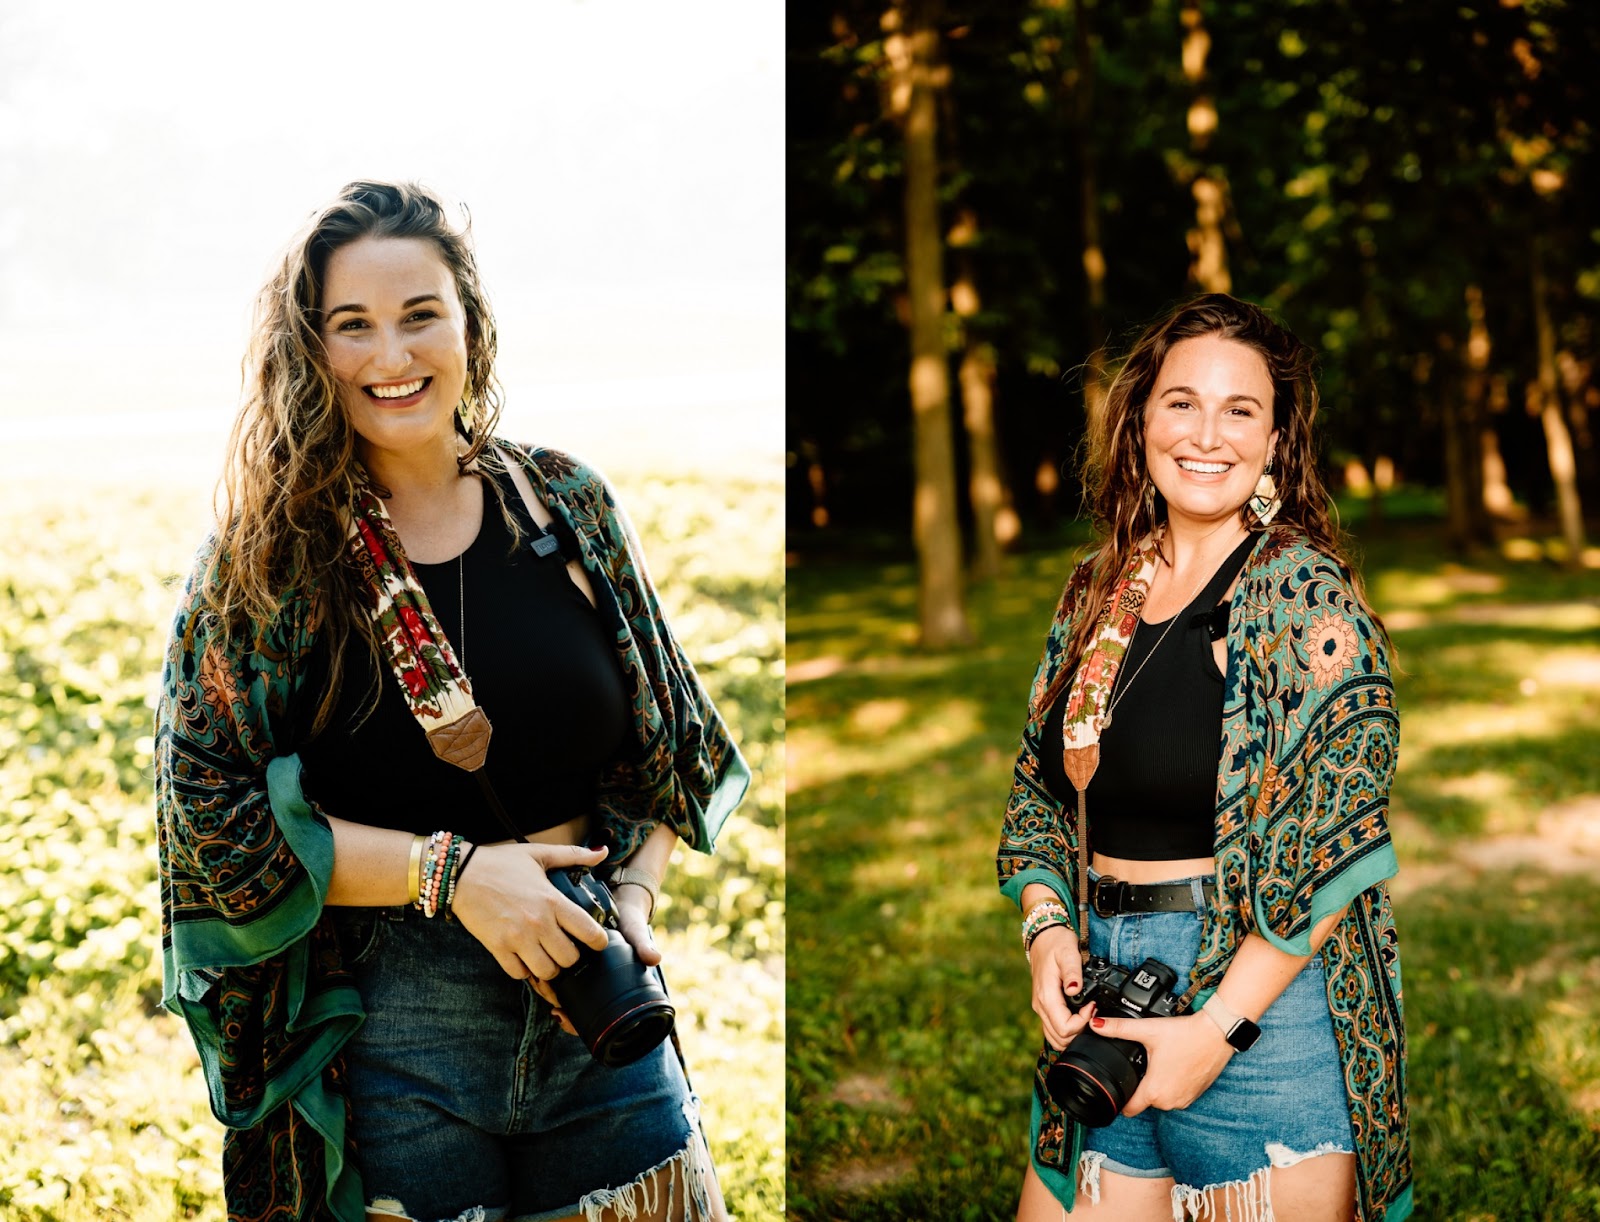
Remember those green muddy flat images above? Watch what happened when I had Darci move me so that I was facing an open sky at the same location.
Not only does having foliage / having something behind the photographer cause color casting. It can also flatten out your subject’s face through in a not-so-great use of the method “ flat lighting” ( obvious name there lol). This makes your client’s natural features look less prominent and dull. Leading to the muddy part of the muddy green cast you’re seeing.
Here are two diagram examples of what to do / what not to do and why it’s happening…
Check out this short clip from the location takeover in the Collective membership. To get the full picture of exactly what I’m talking about!
Do you see the difference yet? And what’s working here?
But what if the location you have isn’t giving you the option to have an open field or environment? When I went to a collective student (Darci’s location take over Video) for a teaching session, we ran into this issue. There was a wooded area that she loved. However, she just could never get the green casting out. She still wanted to use this spot. Check out this short clip of how we mastered the situation!
The difference…
So there you have it! If you want to learn more and master this skill join the full class + over 40 others! With a little location manipulation, you can banish those green tones.
If you have any questions feel free to comment on this blog or join our Collective monthly membership here to keep learning!
